Appearance
Labels for Automations
Labels let you tag and organize your Automations so you can filter and find related funnels quickly. Each label has a name and a color you choose when creating it.
Creating Labels
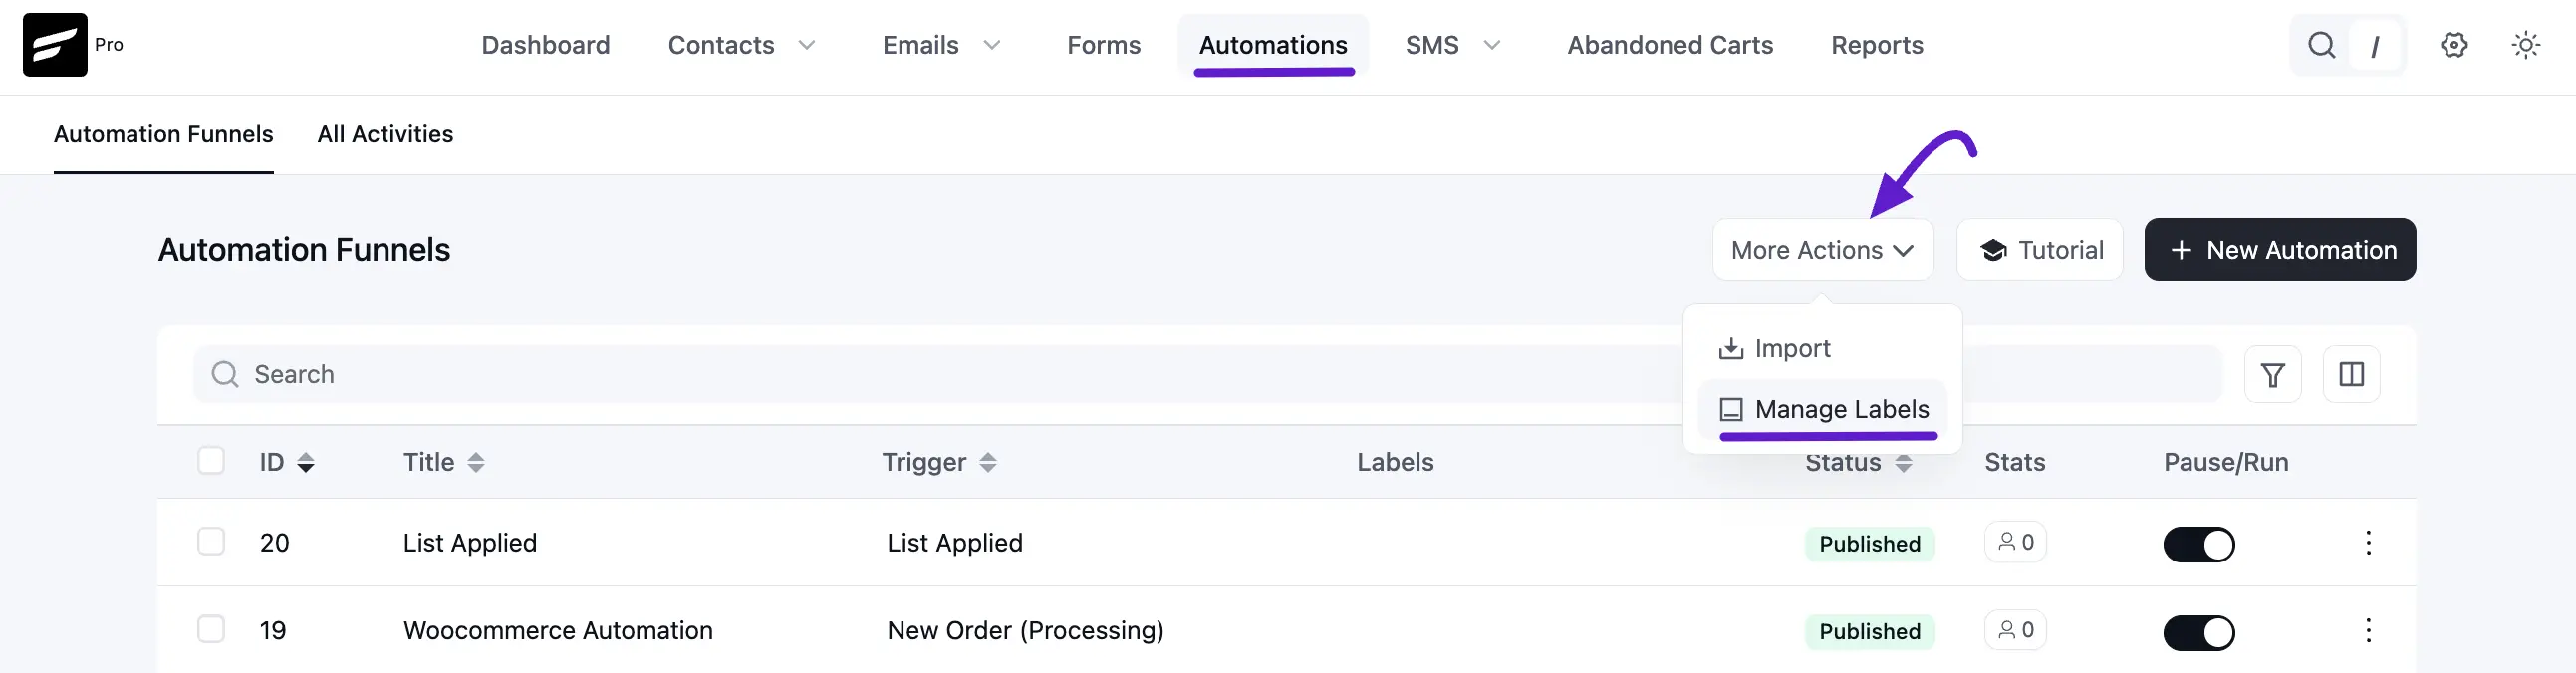
Go to the Automations section in the FluentCRM navbar, open the More Actions dropdown in the top-right corner, and click Manage Labels.
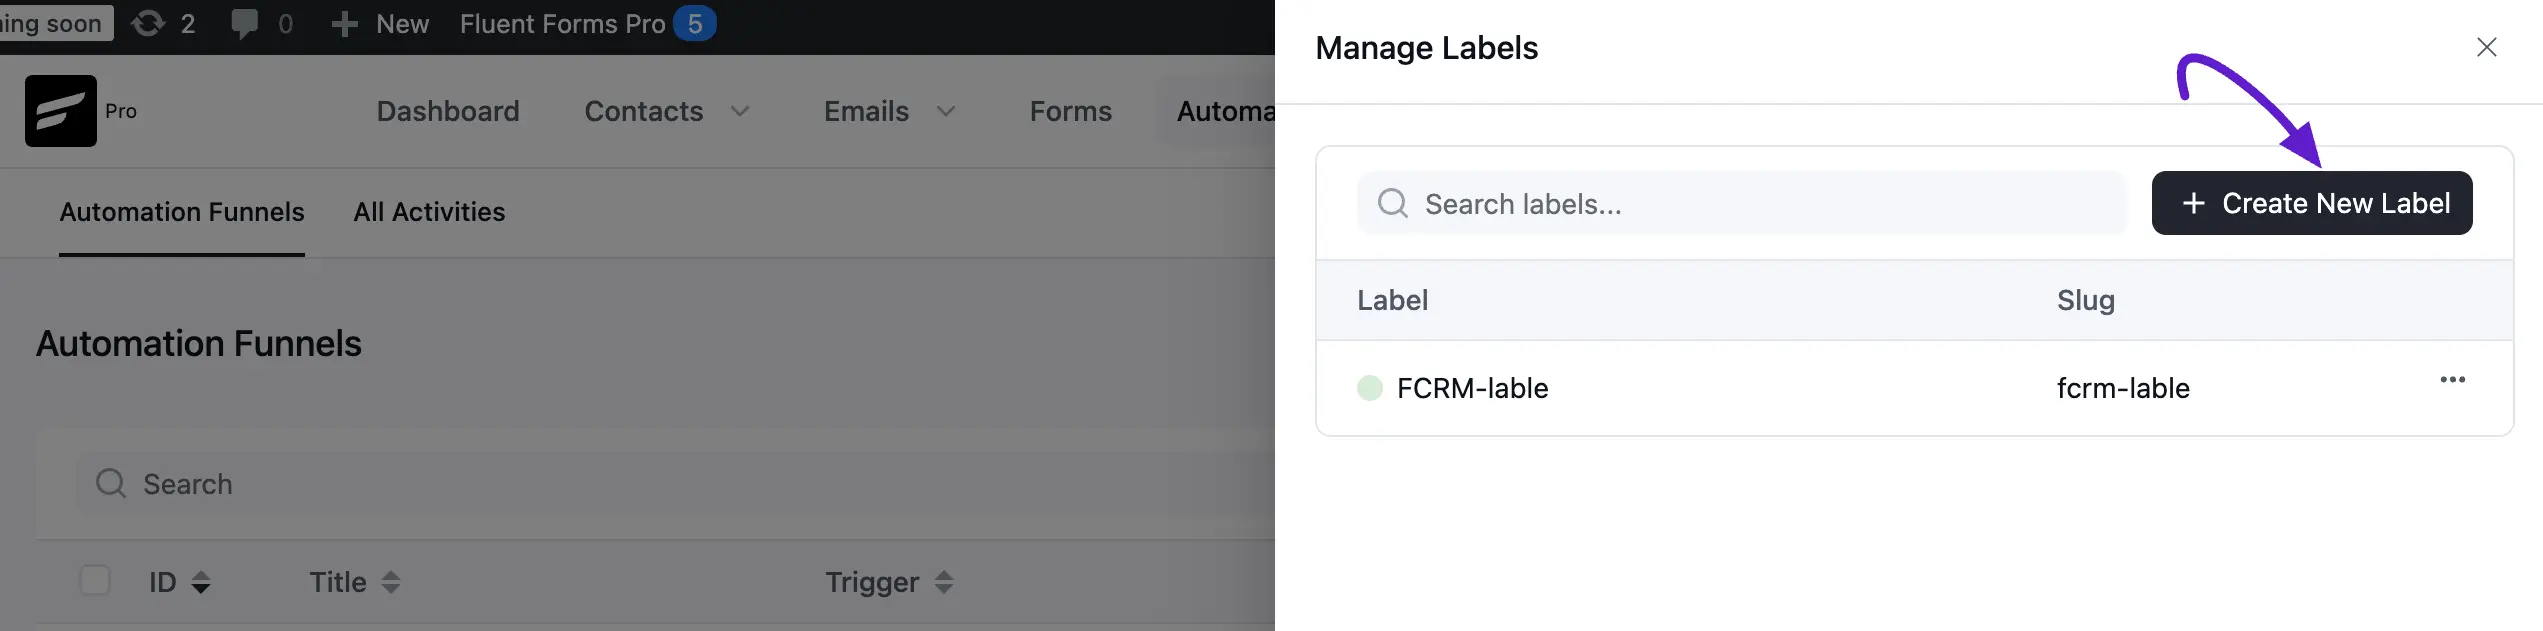
In the panel that opens, click Create New Label. Your existing labels are listed here too — click the Pencil icon to edit one or the Trash icon to delete it.
Enter a Name, pick a Color, and click Create.
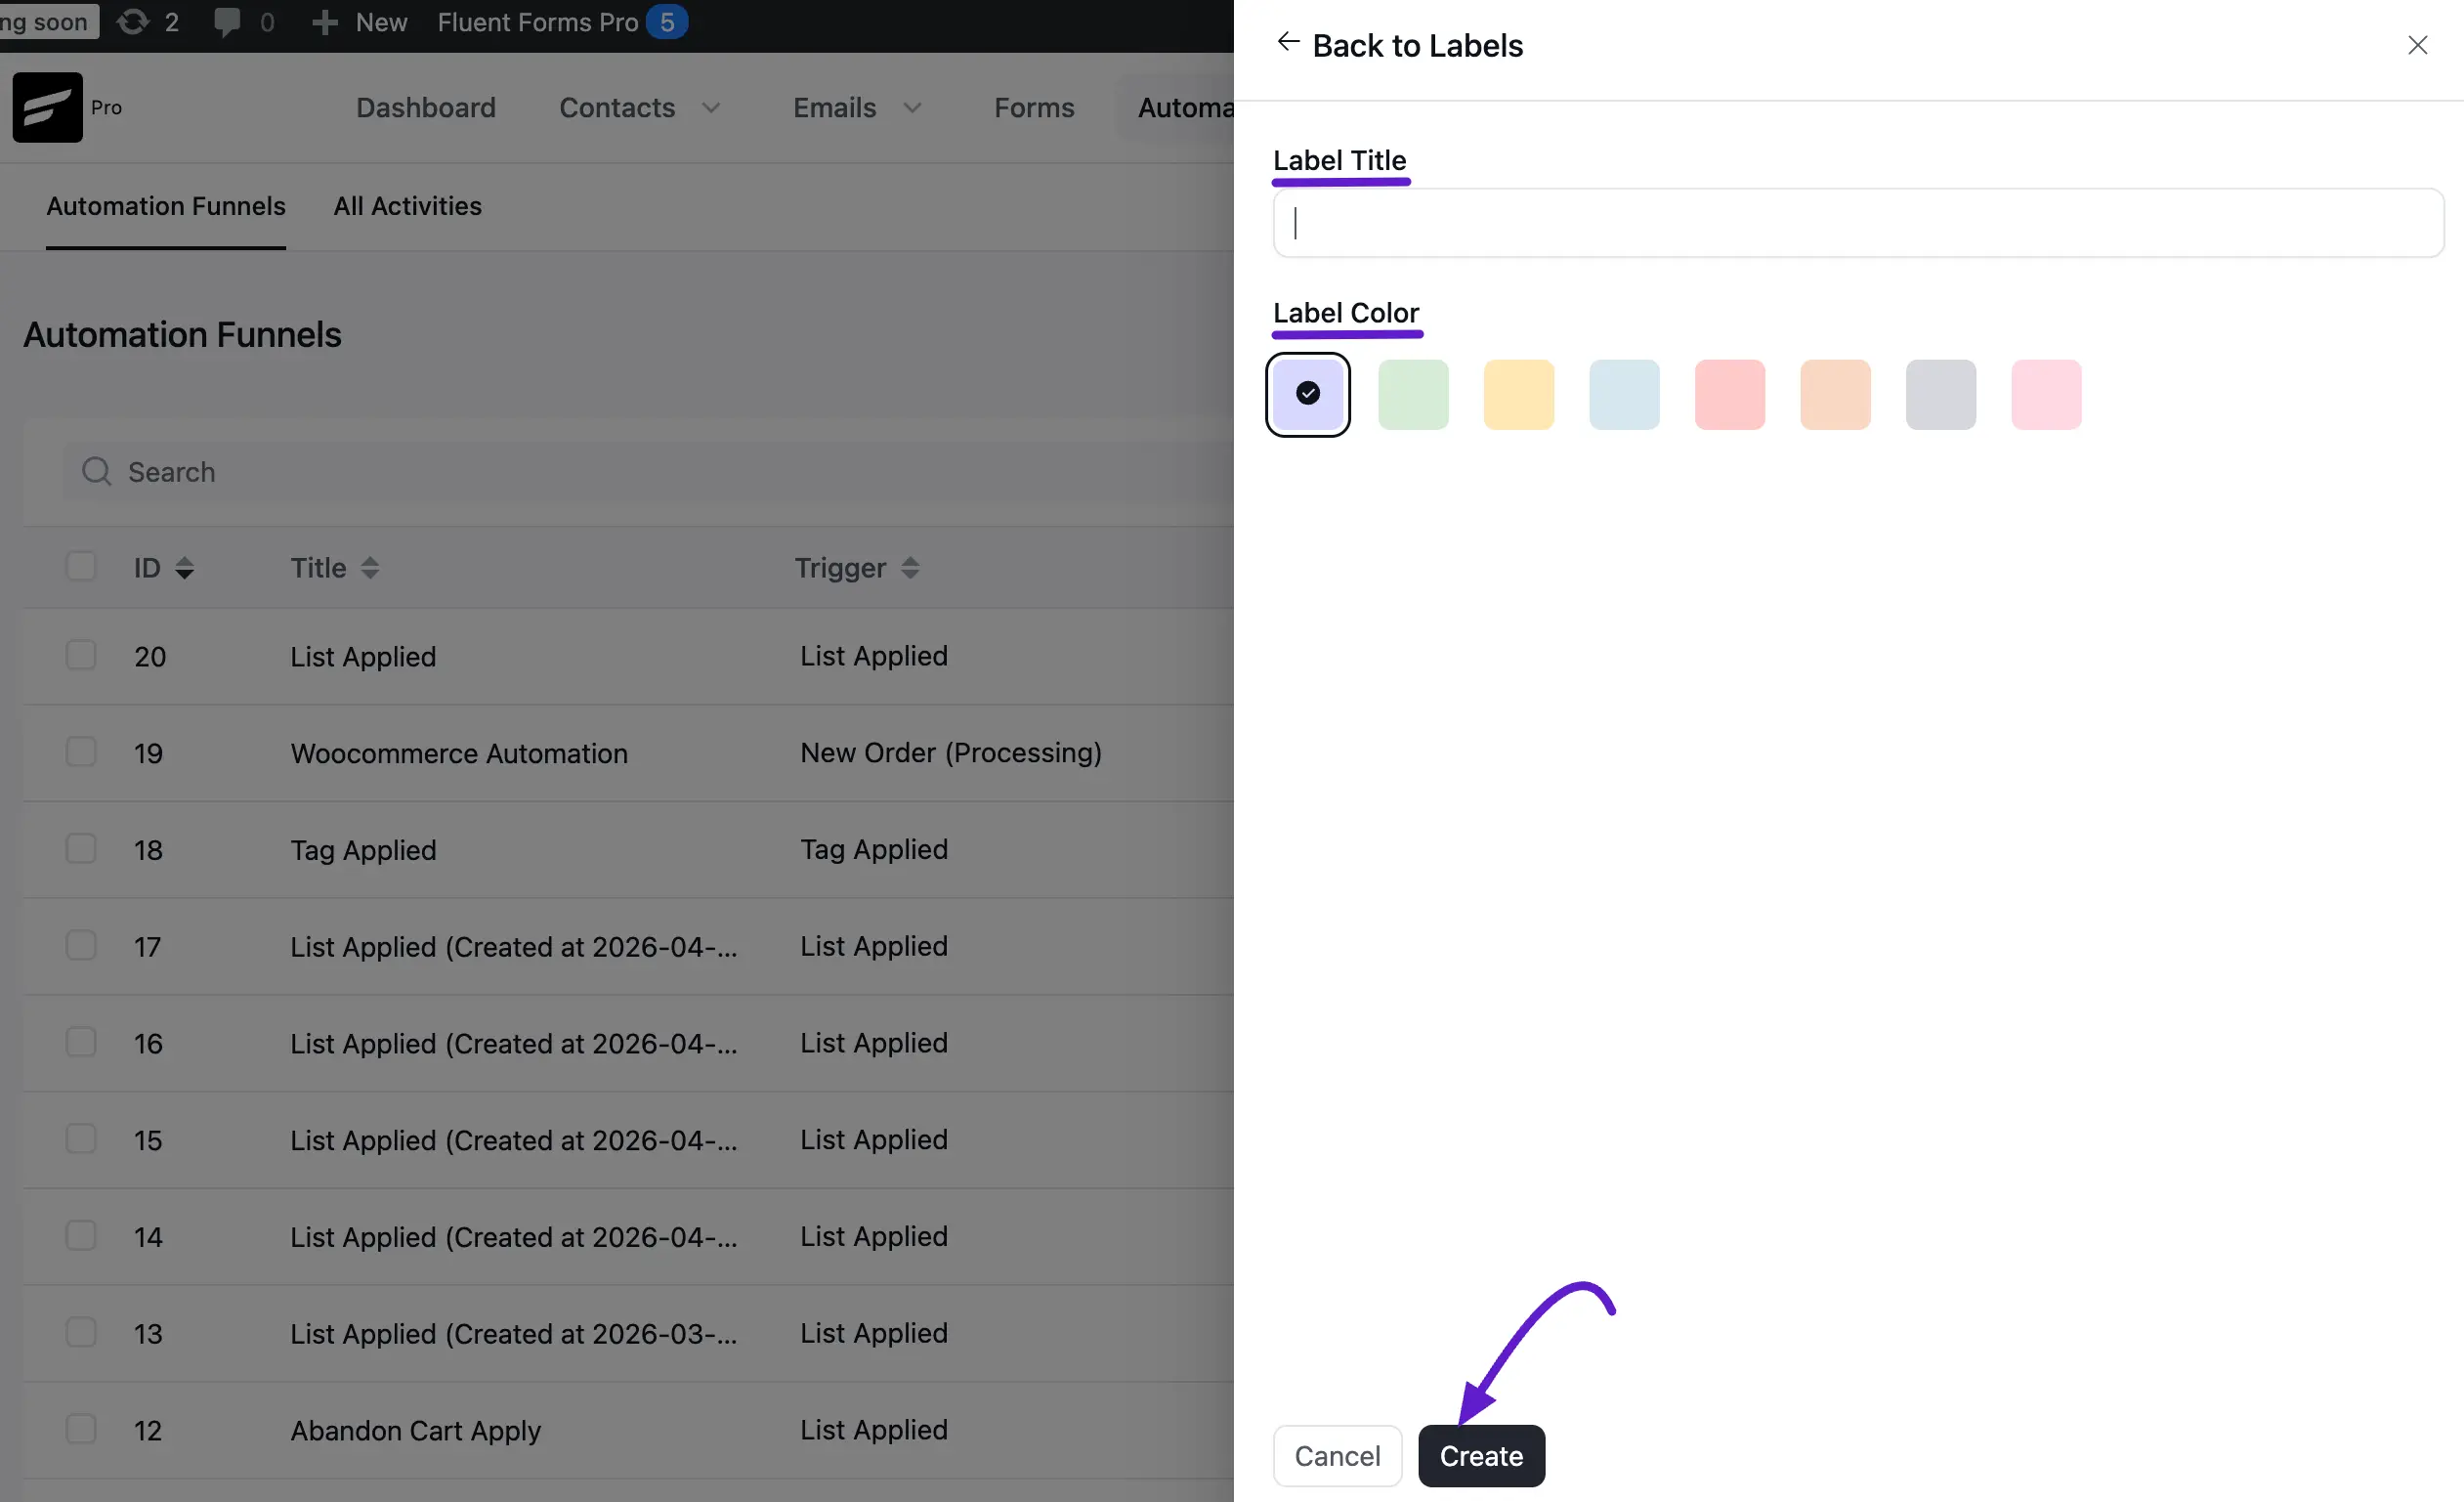
NOTE
Label colors display correctly in both light and dark mode pick any color from the palette and the label text stays readable.
Applying Labels
You can apply labels in bulk from the automations list, or one at a time from the row menu.
Bulk apply: Select one or more automations using their checkboxes. The Select Action bar appears at the bottom — open the dropdown, choose Apply Labels, select the labels you want, and click Apply Label.
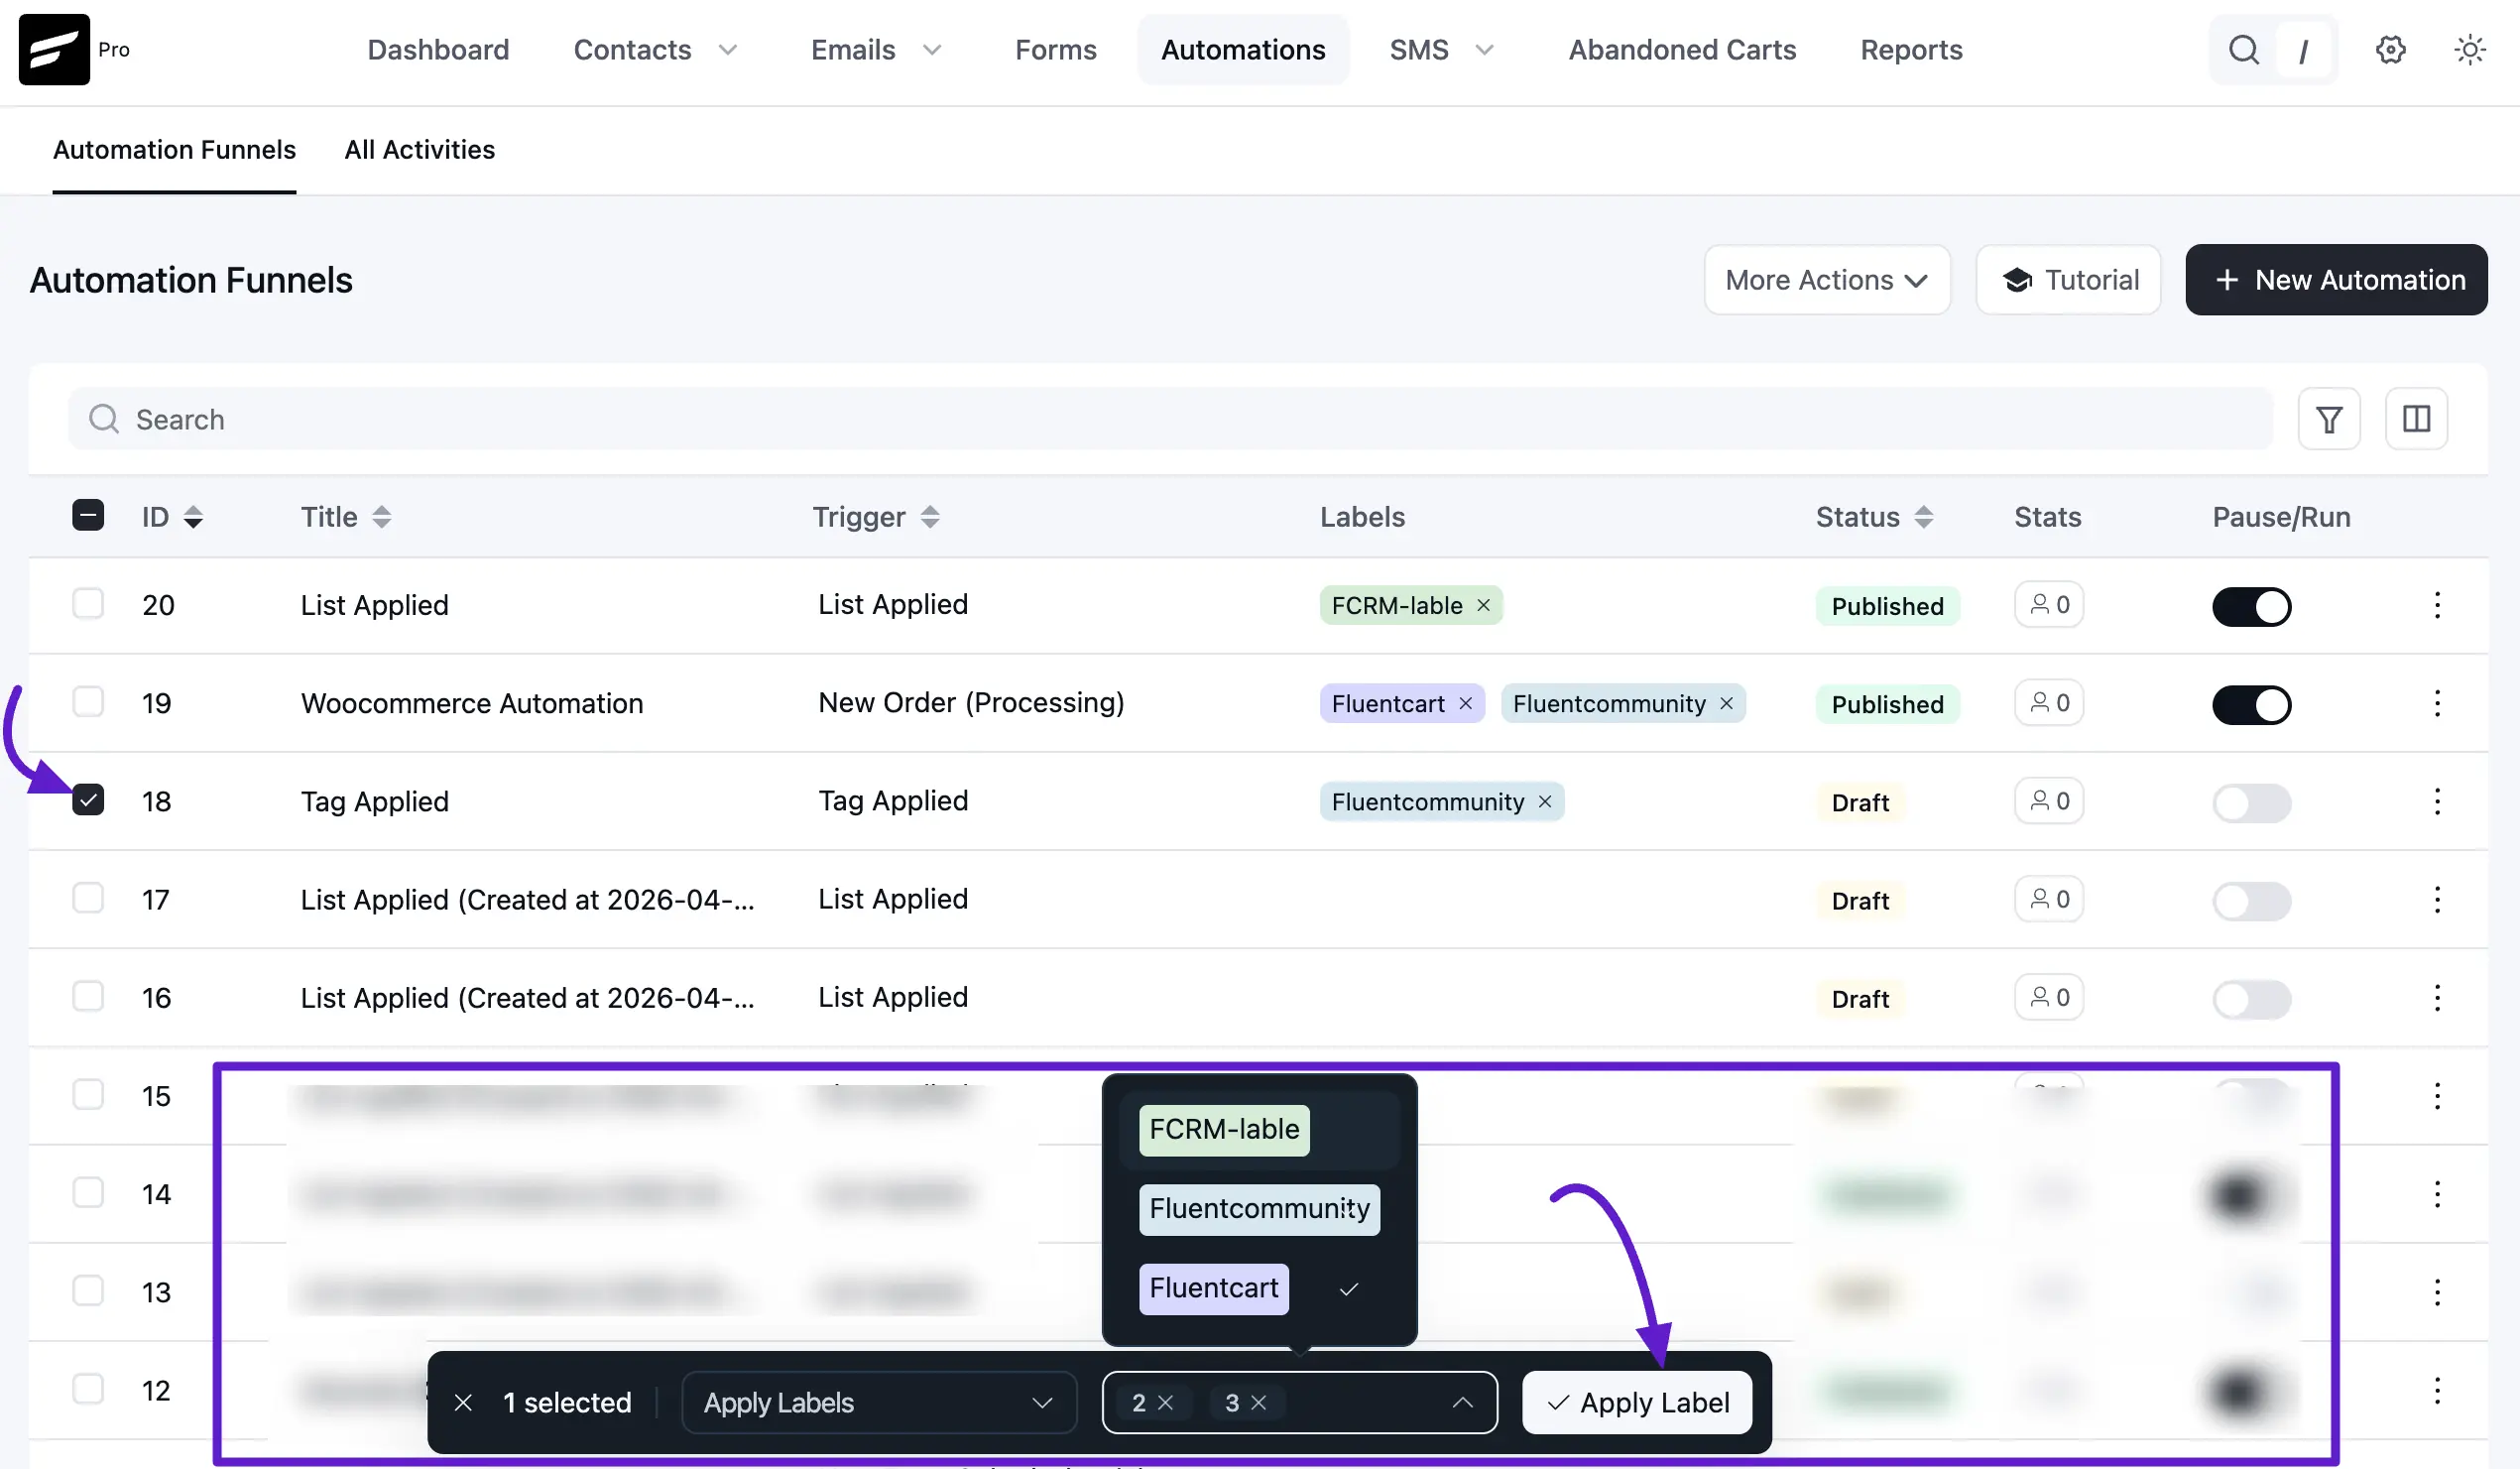
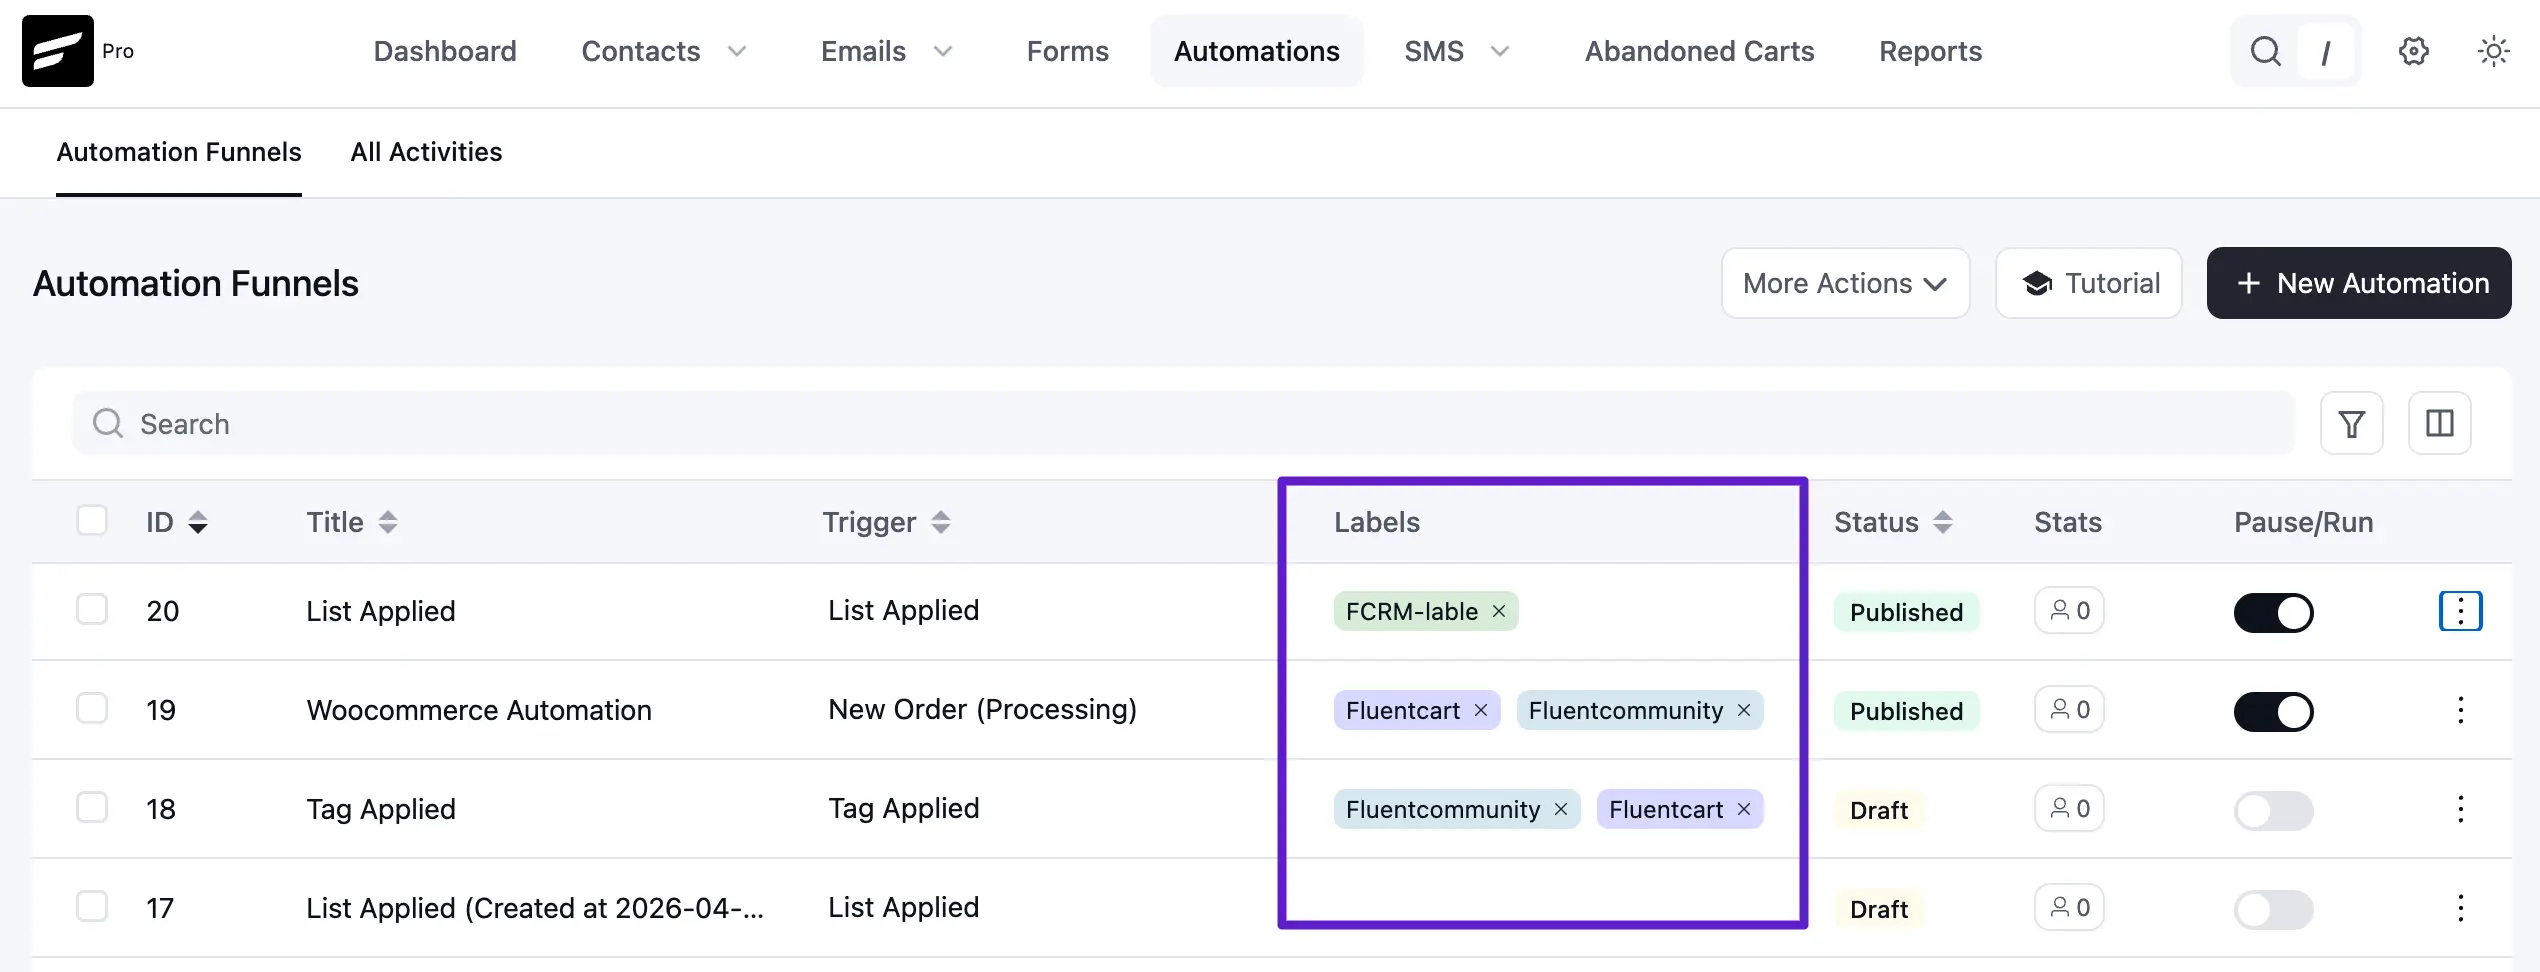
The labels appear in the Labels column next to each automation.
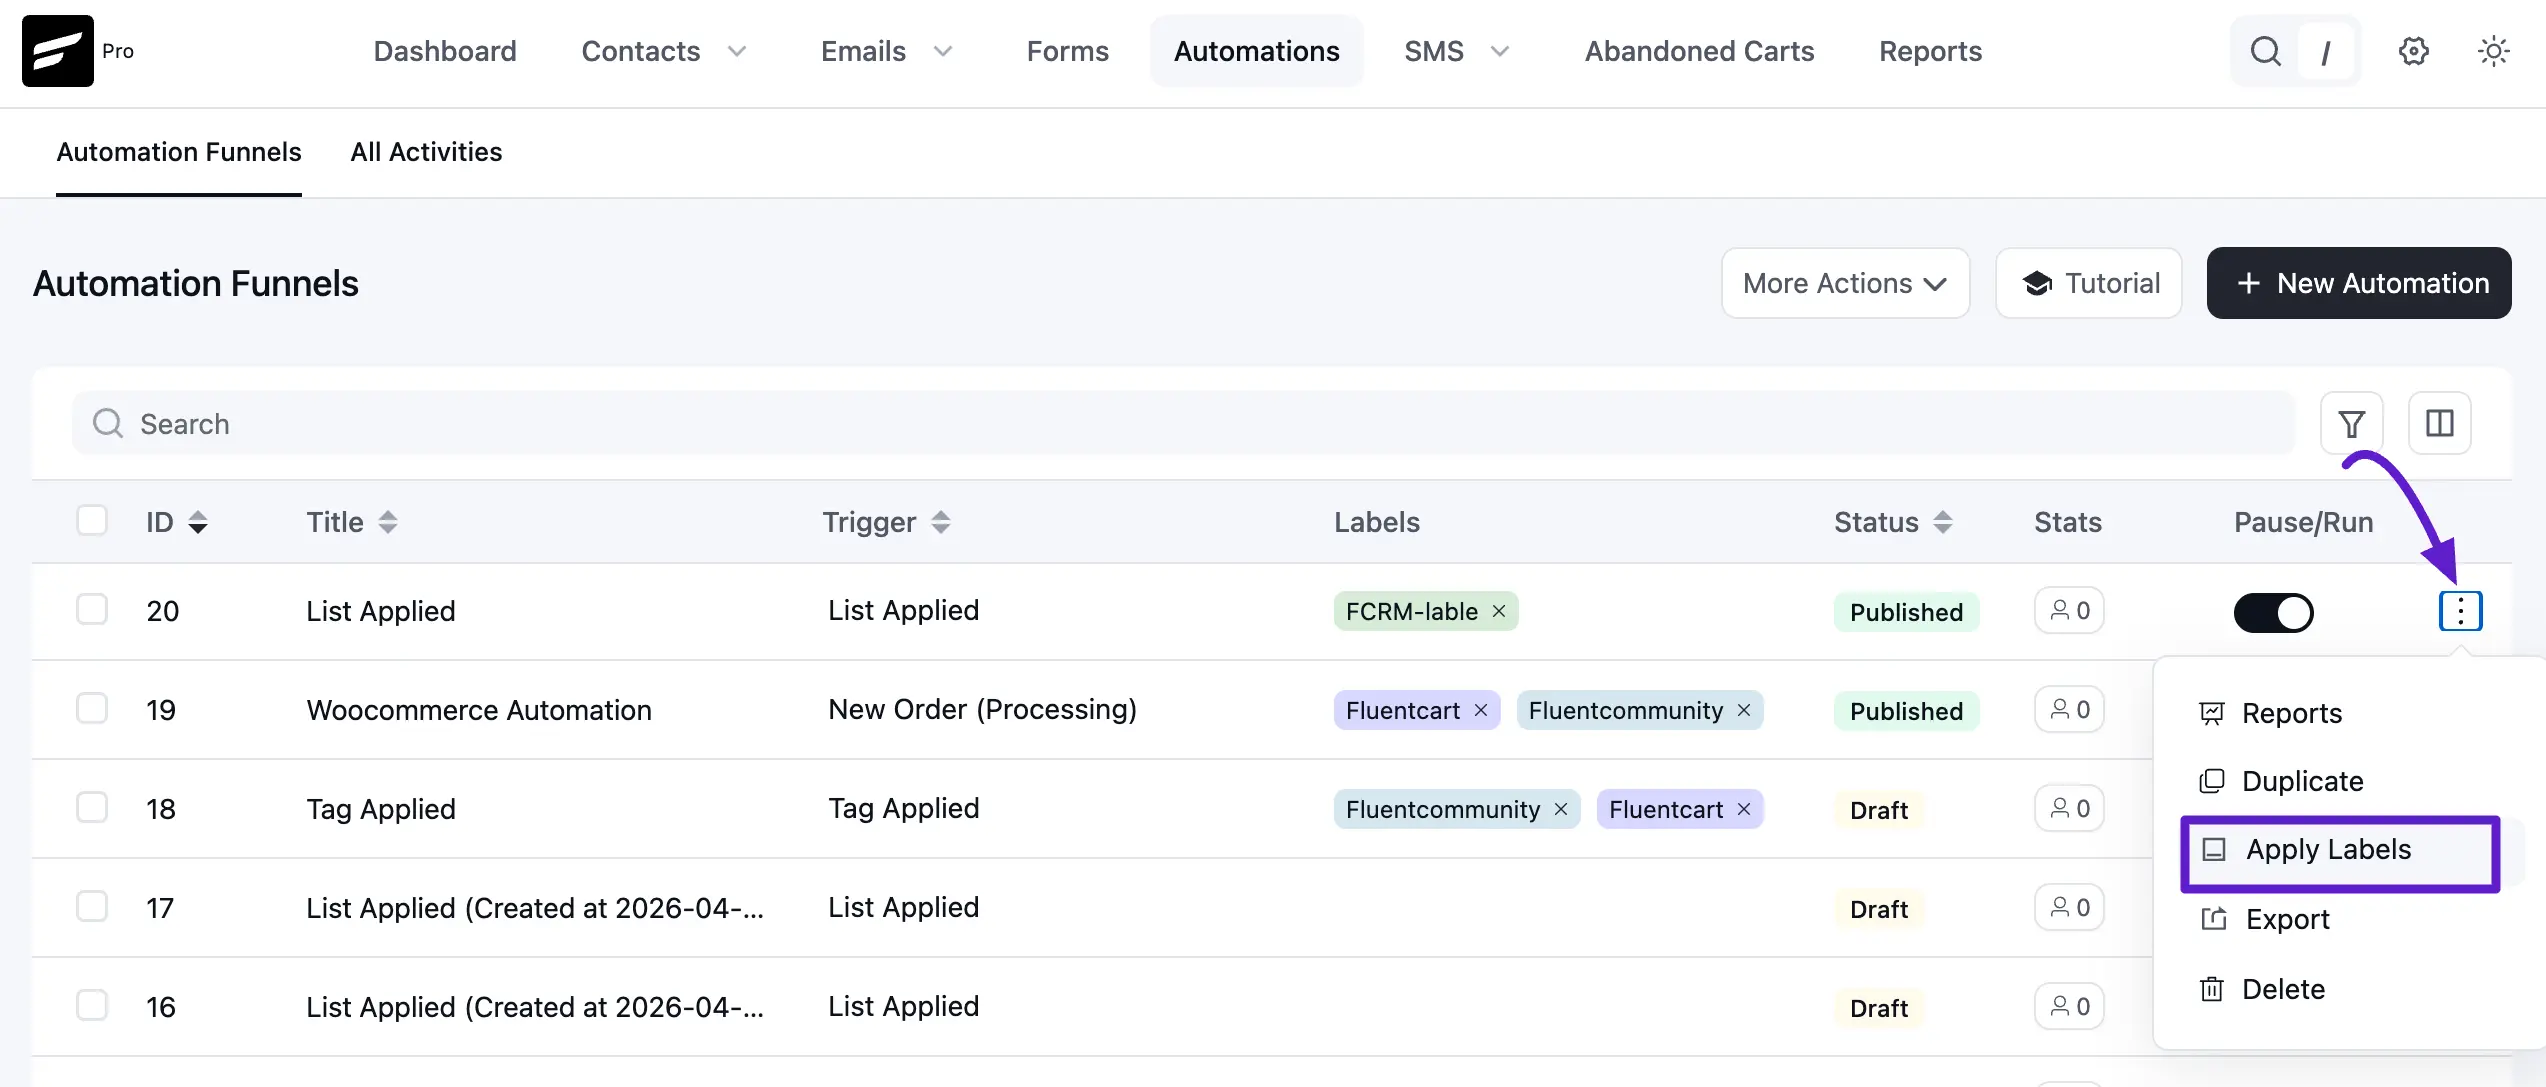
Row menu apply: Click the three-dot menu on any automation row and select Apply Labels.
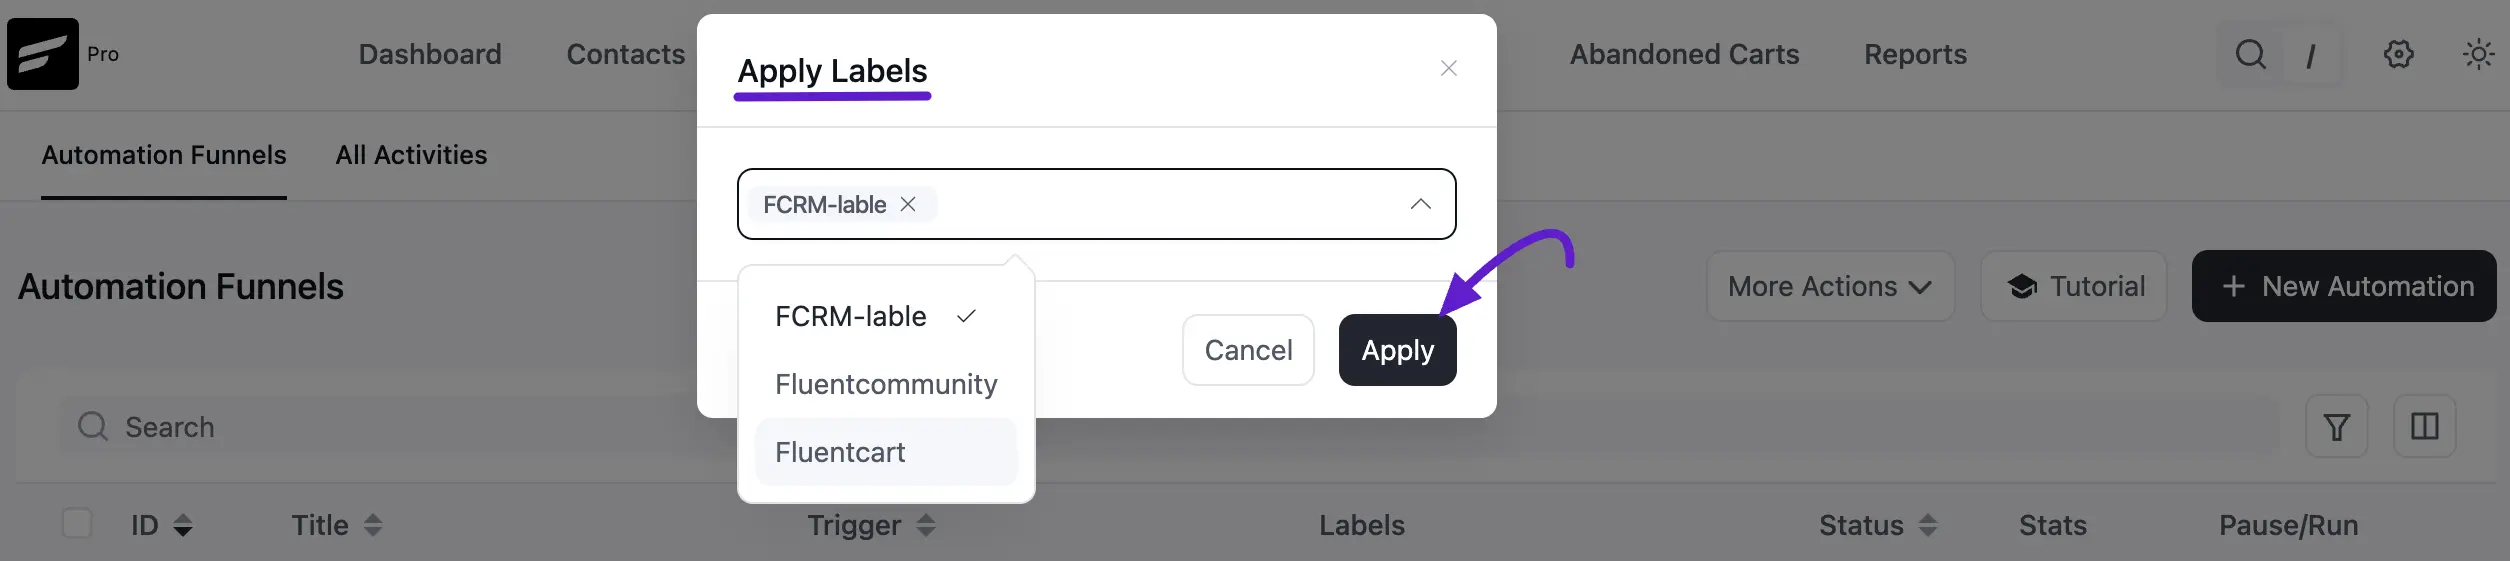
Choose the labels from the dropdown and click Apply.
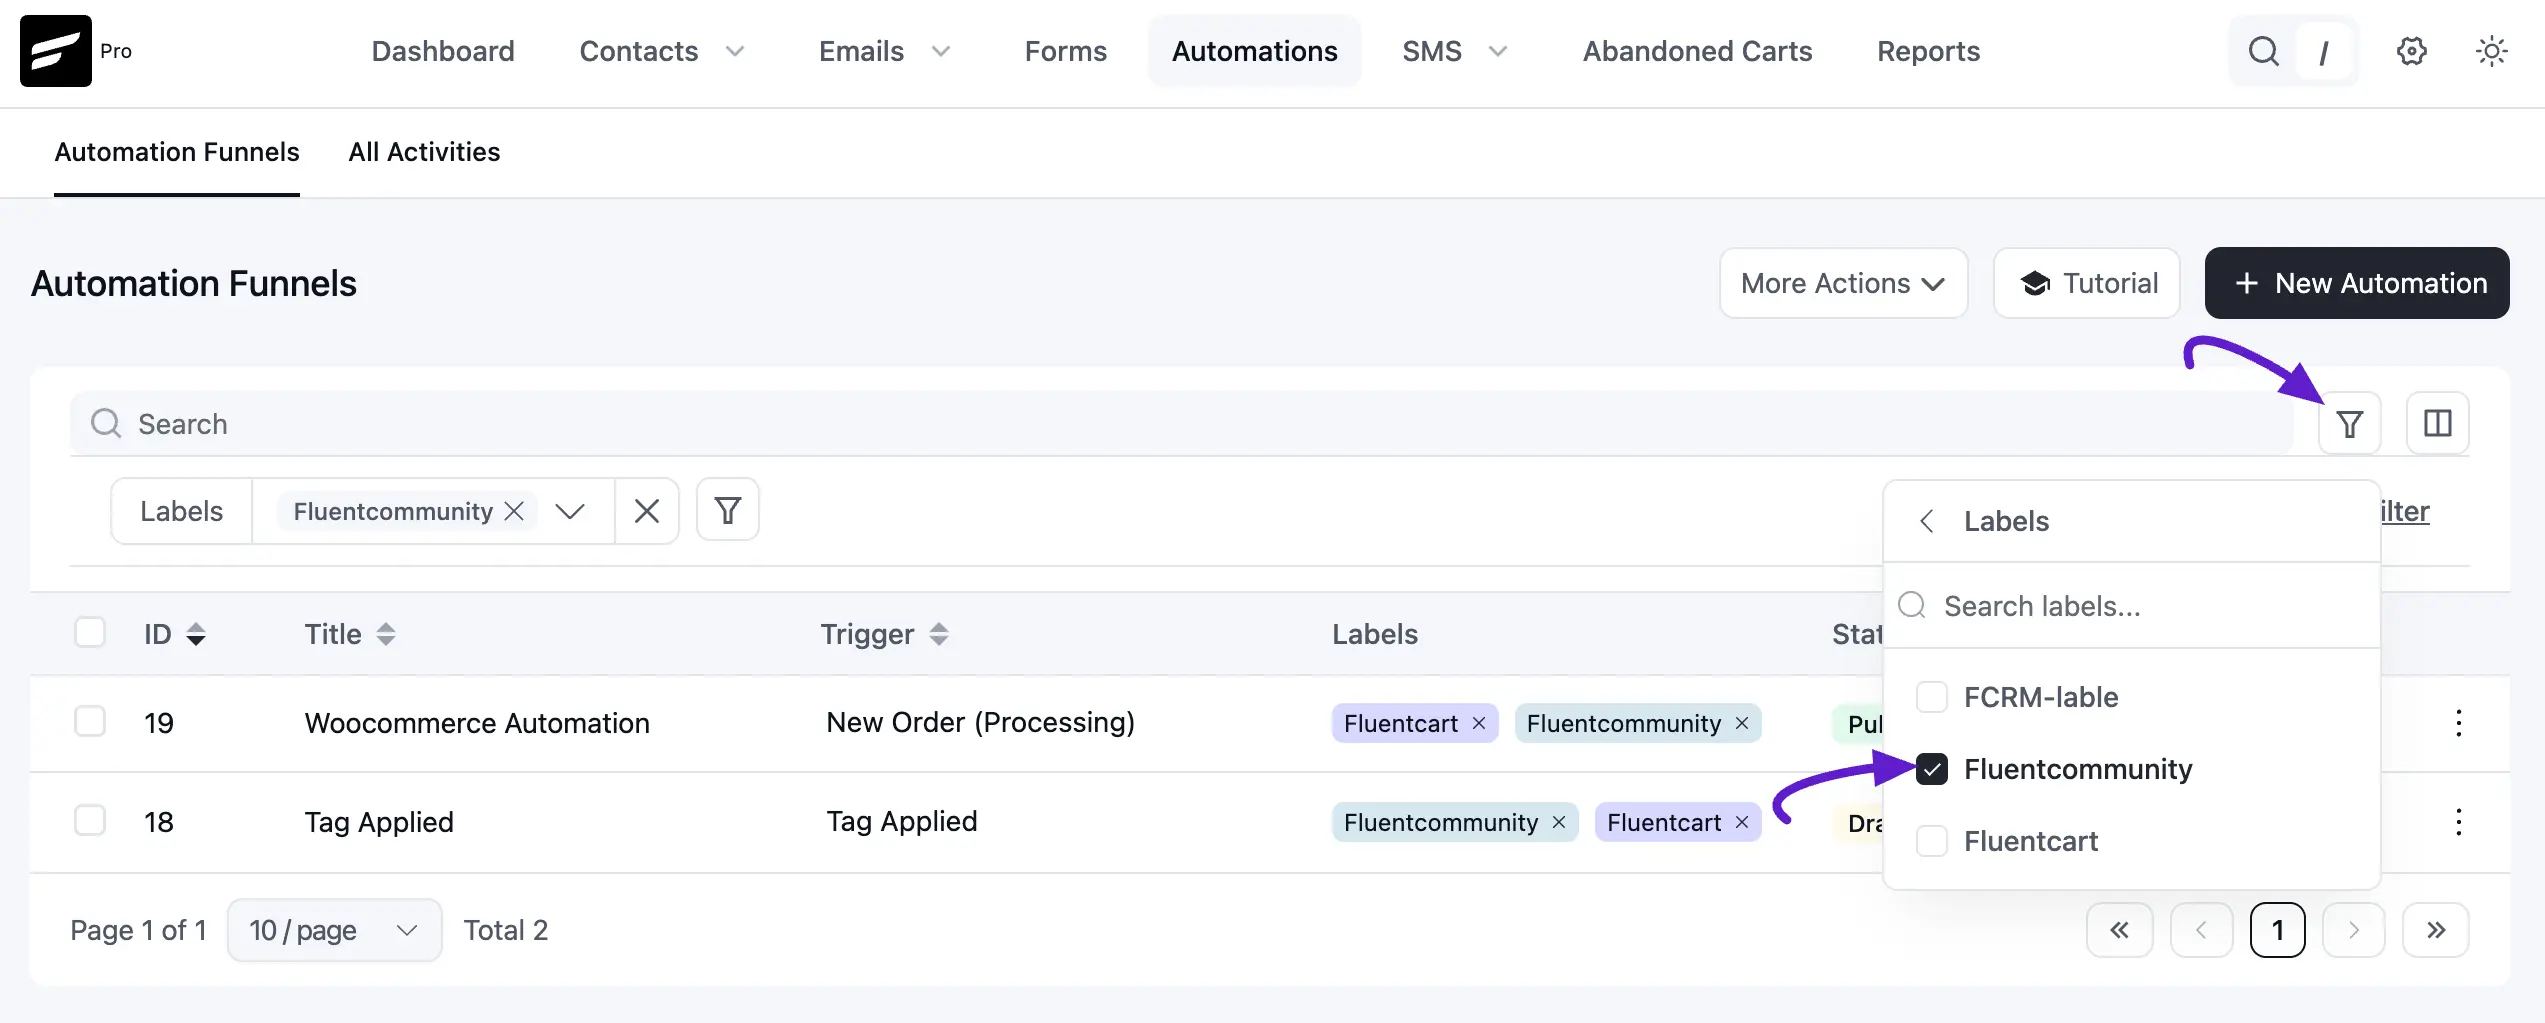
Filtering Automations by Labels
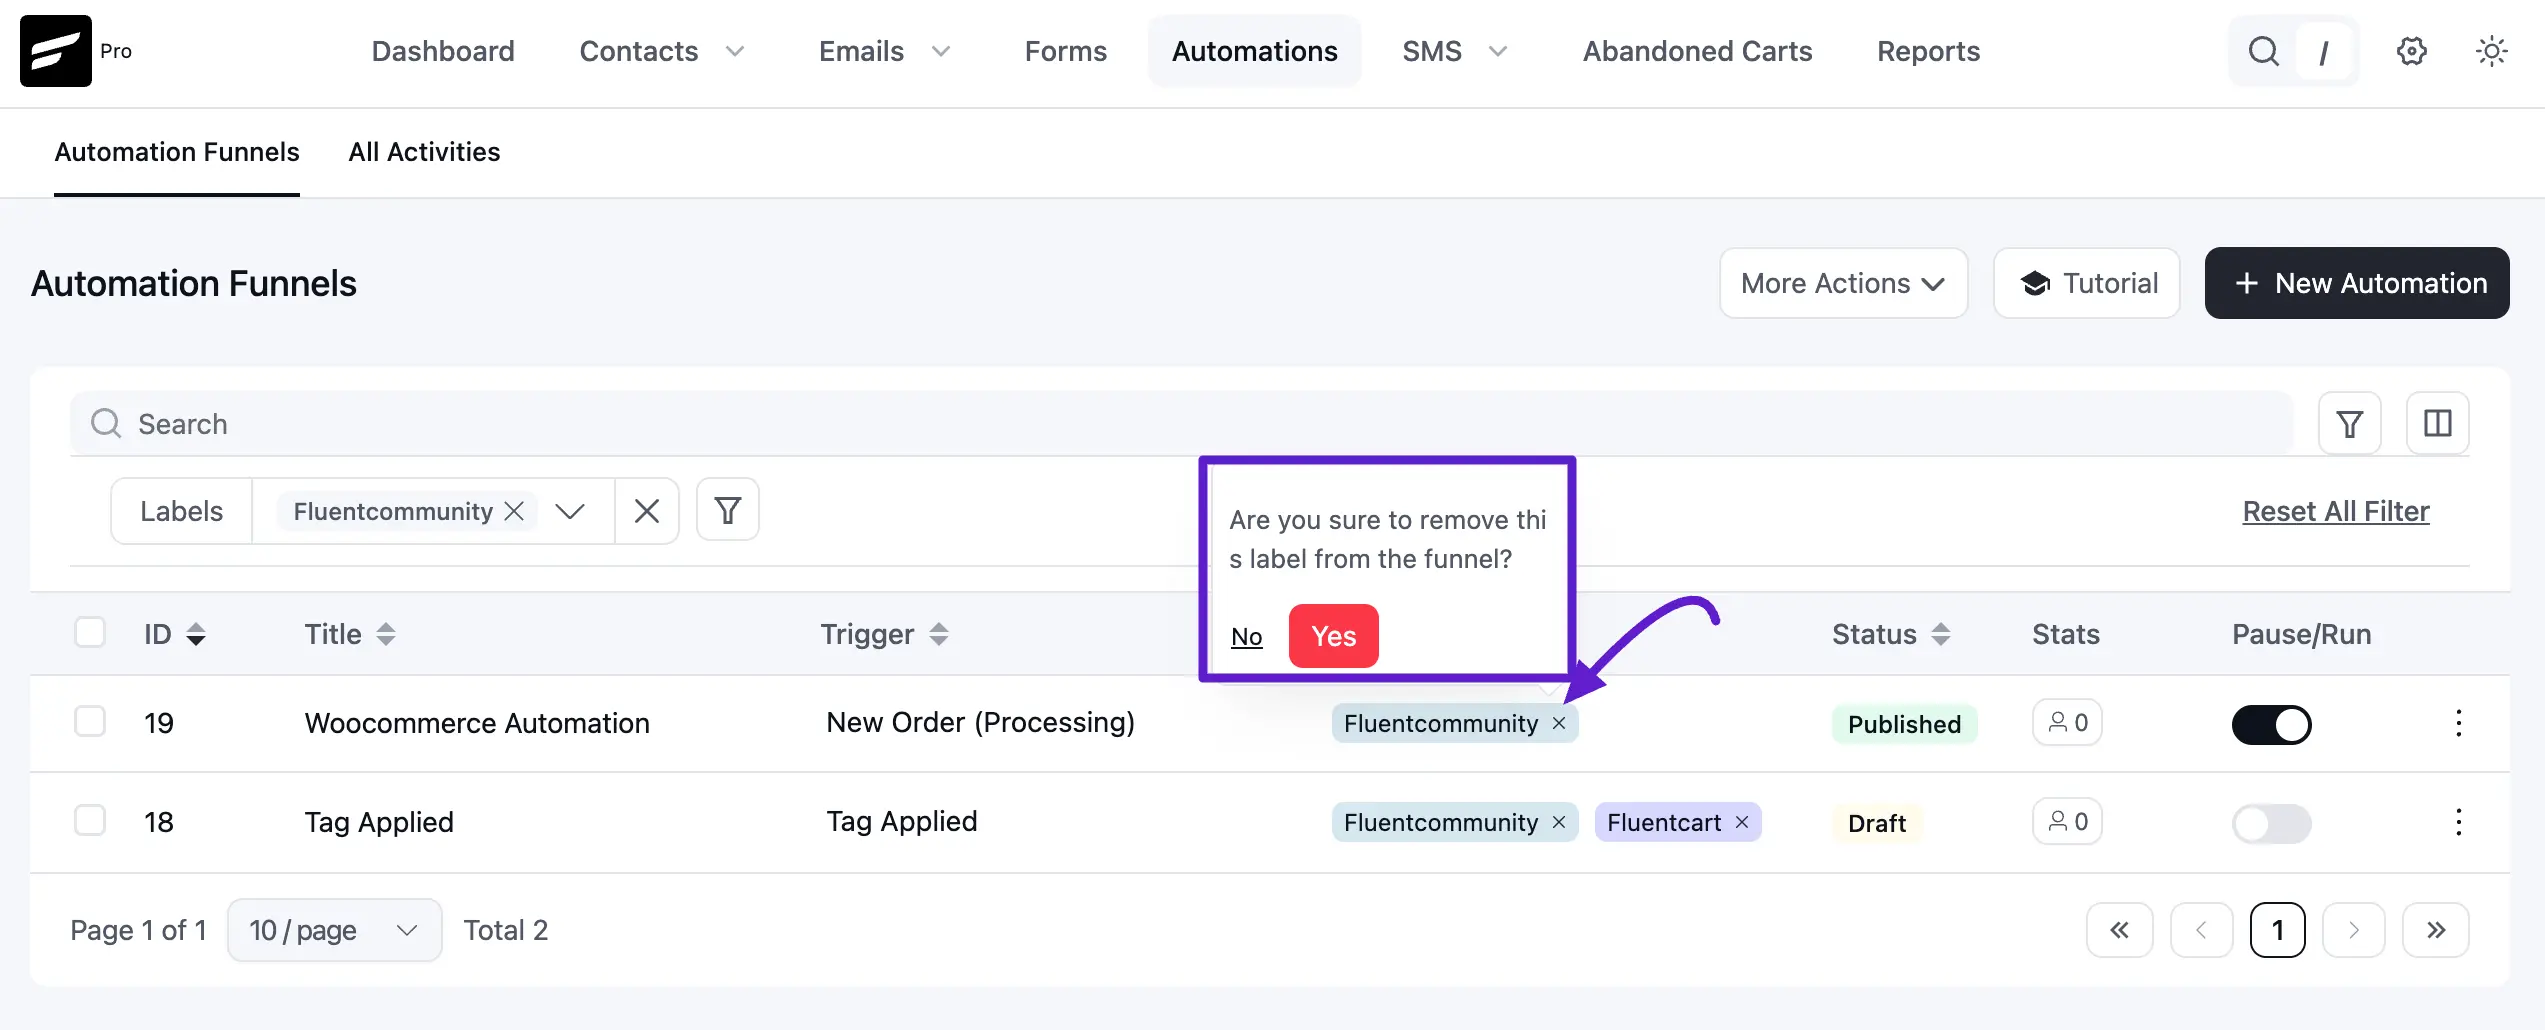
To see only automations with a specific label, click the Filter icon above the list and choose a label from the dropdown. The list updates to show only matching automations.
Deleting Labels
Open Manage Labels, click the Cross icon next to the label name, and confirm with Yes. Deleting a label removes it from all automations it was applied to.