Appearance
Add and Manage All Contacts
FluentCRM's Contacts Dashboard is your central view for all contact activity. This page covers how to add contacts manually and how to manage contacts in bulk.
Adding New Contacts
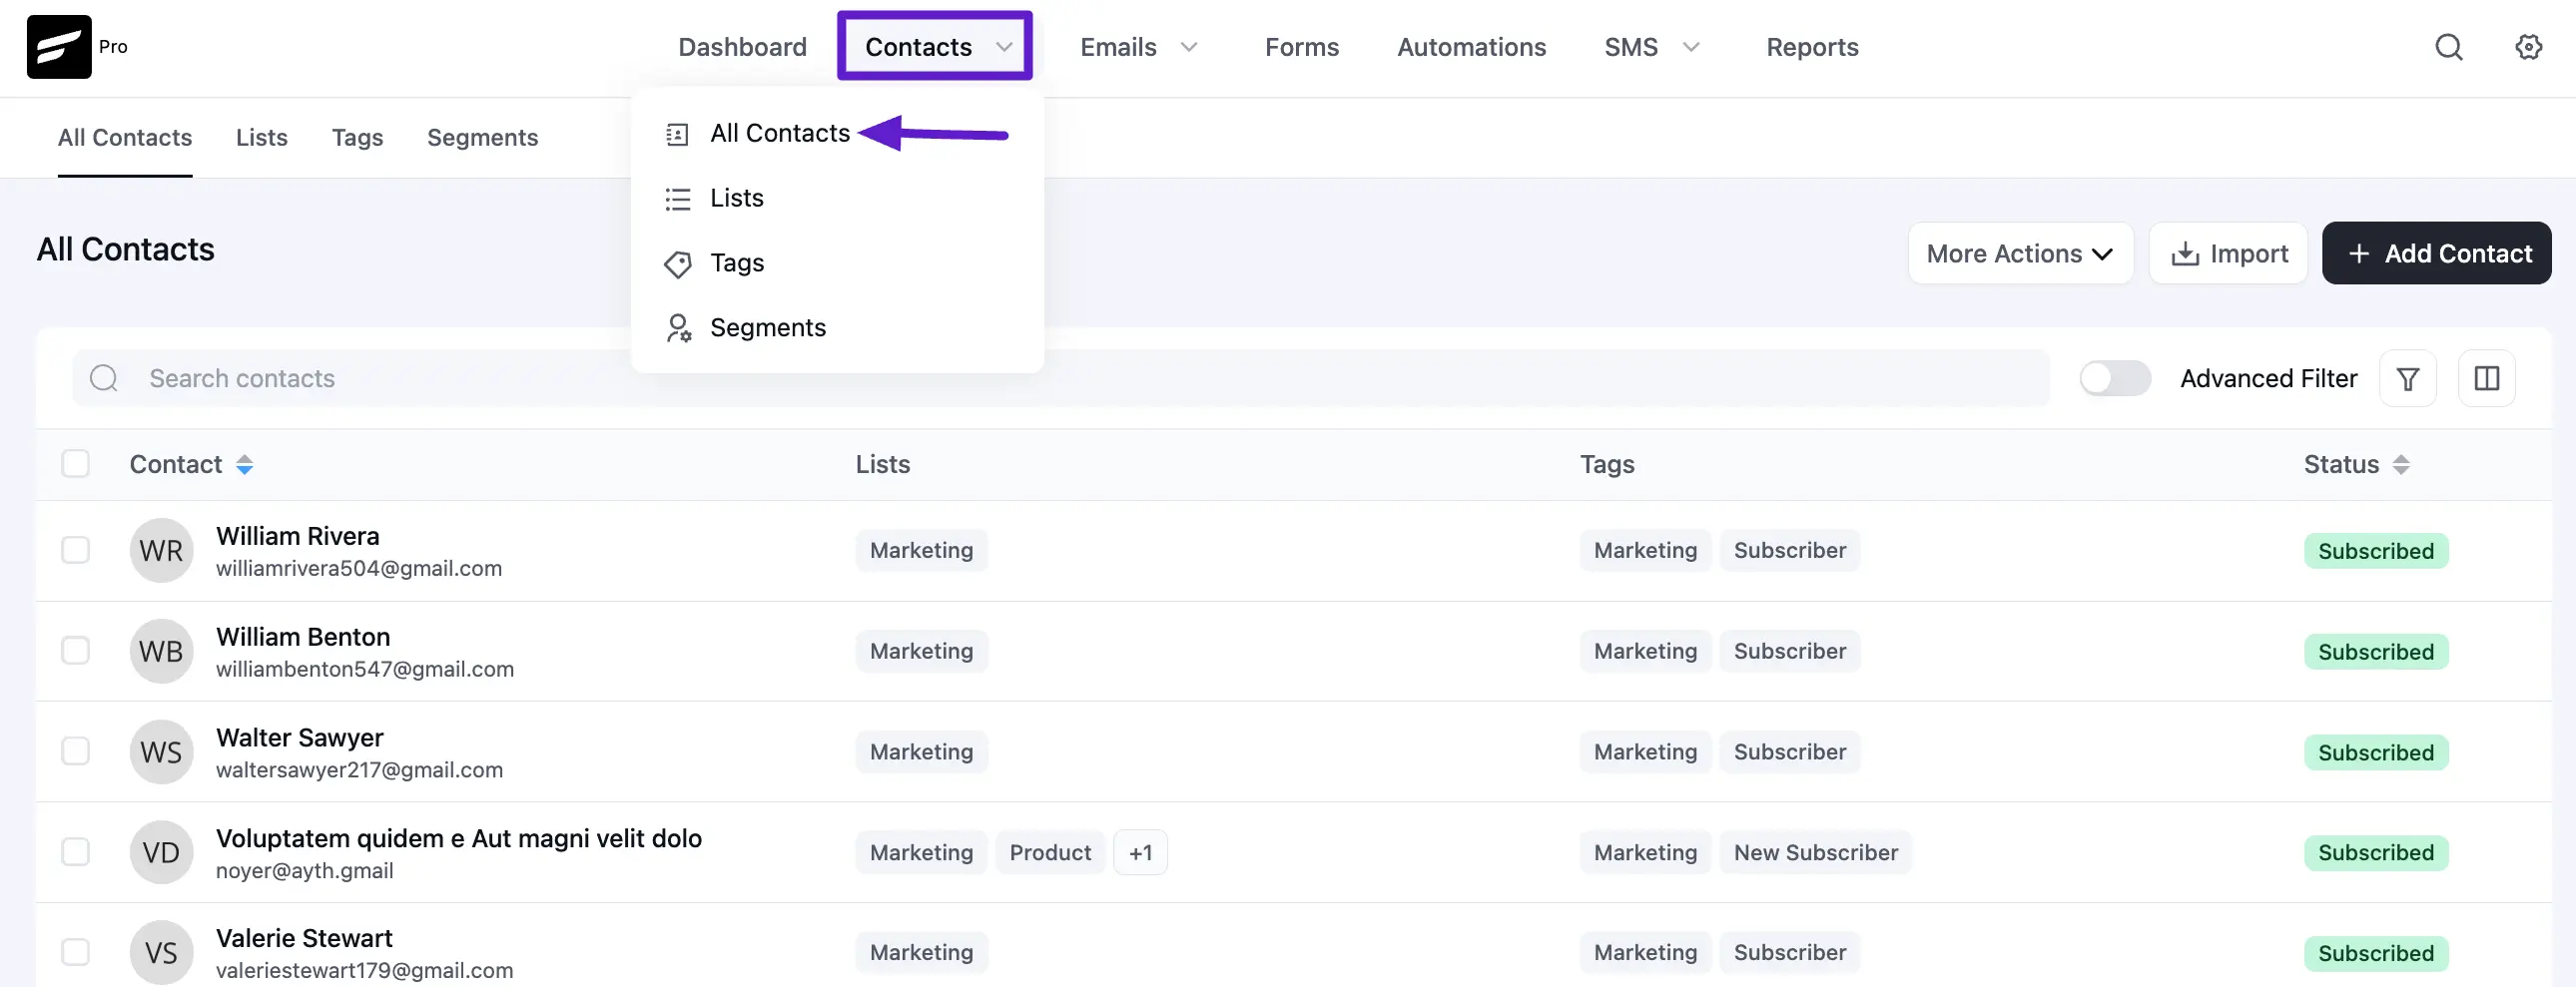
First, go to All Contacts from the Contacts section of the FluentCRM Navbar.
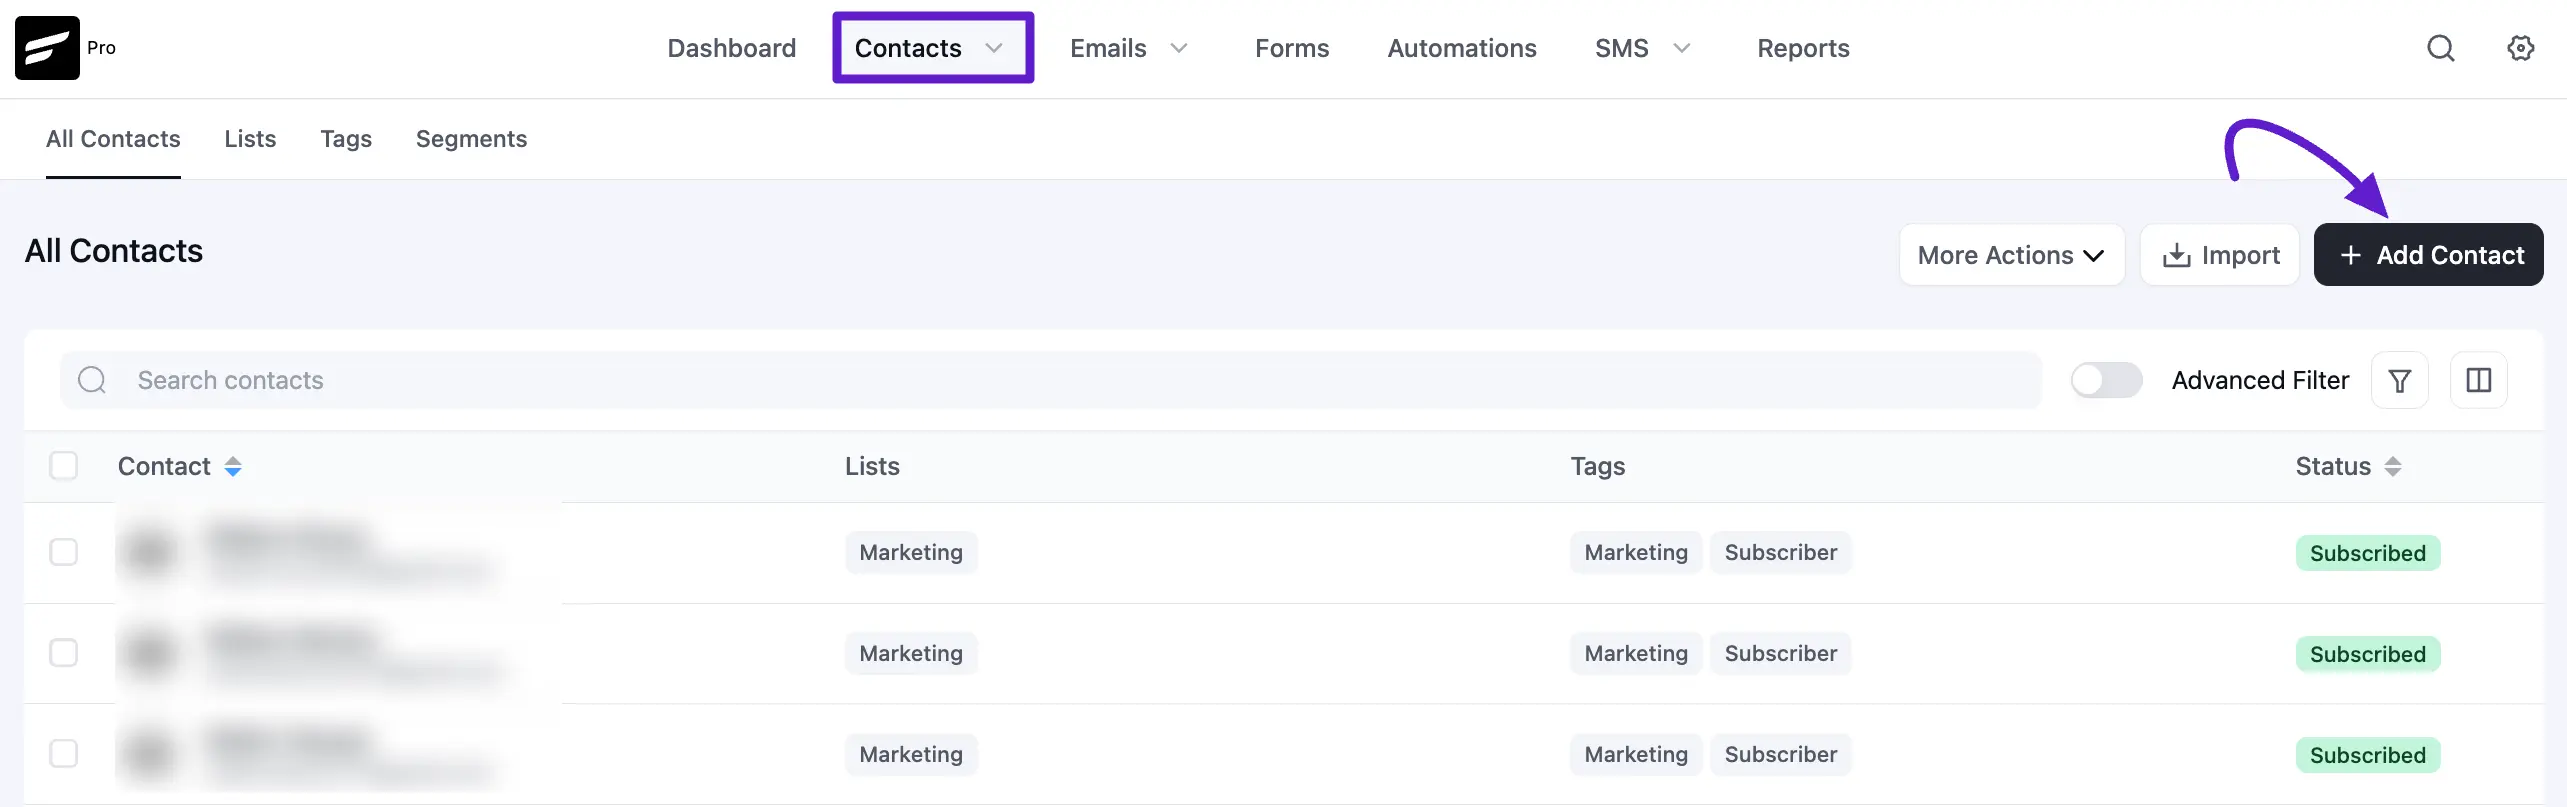
Now, click on the + Add Contact button on the top right corner of the dashboard to add a new contact manually.
Here you can see the full All Contacts Dashboard. To learn more detail use about it, read this Documentation.
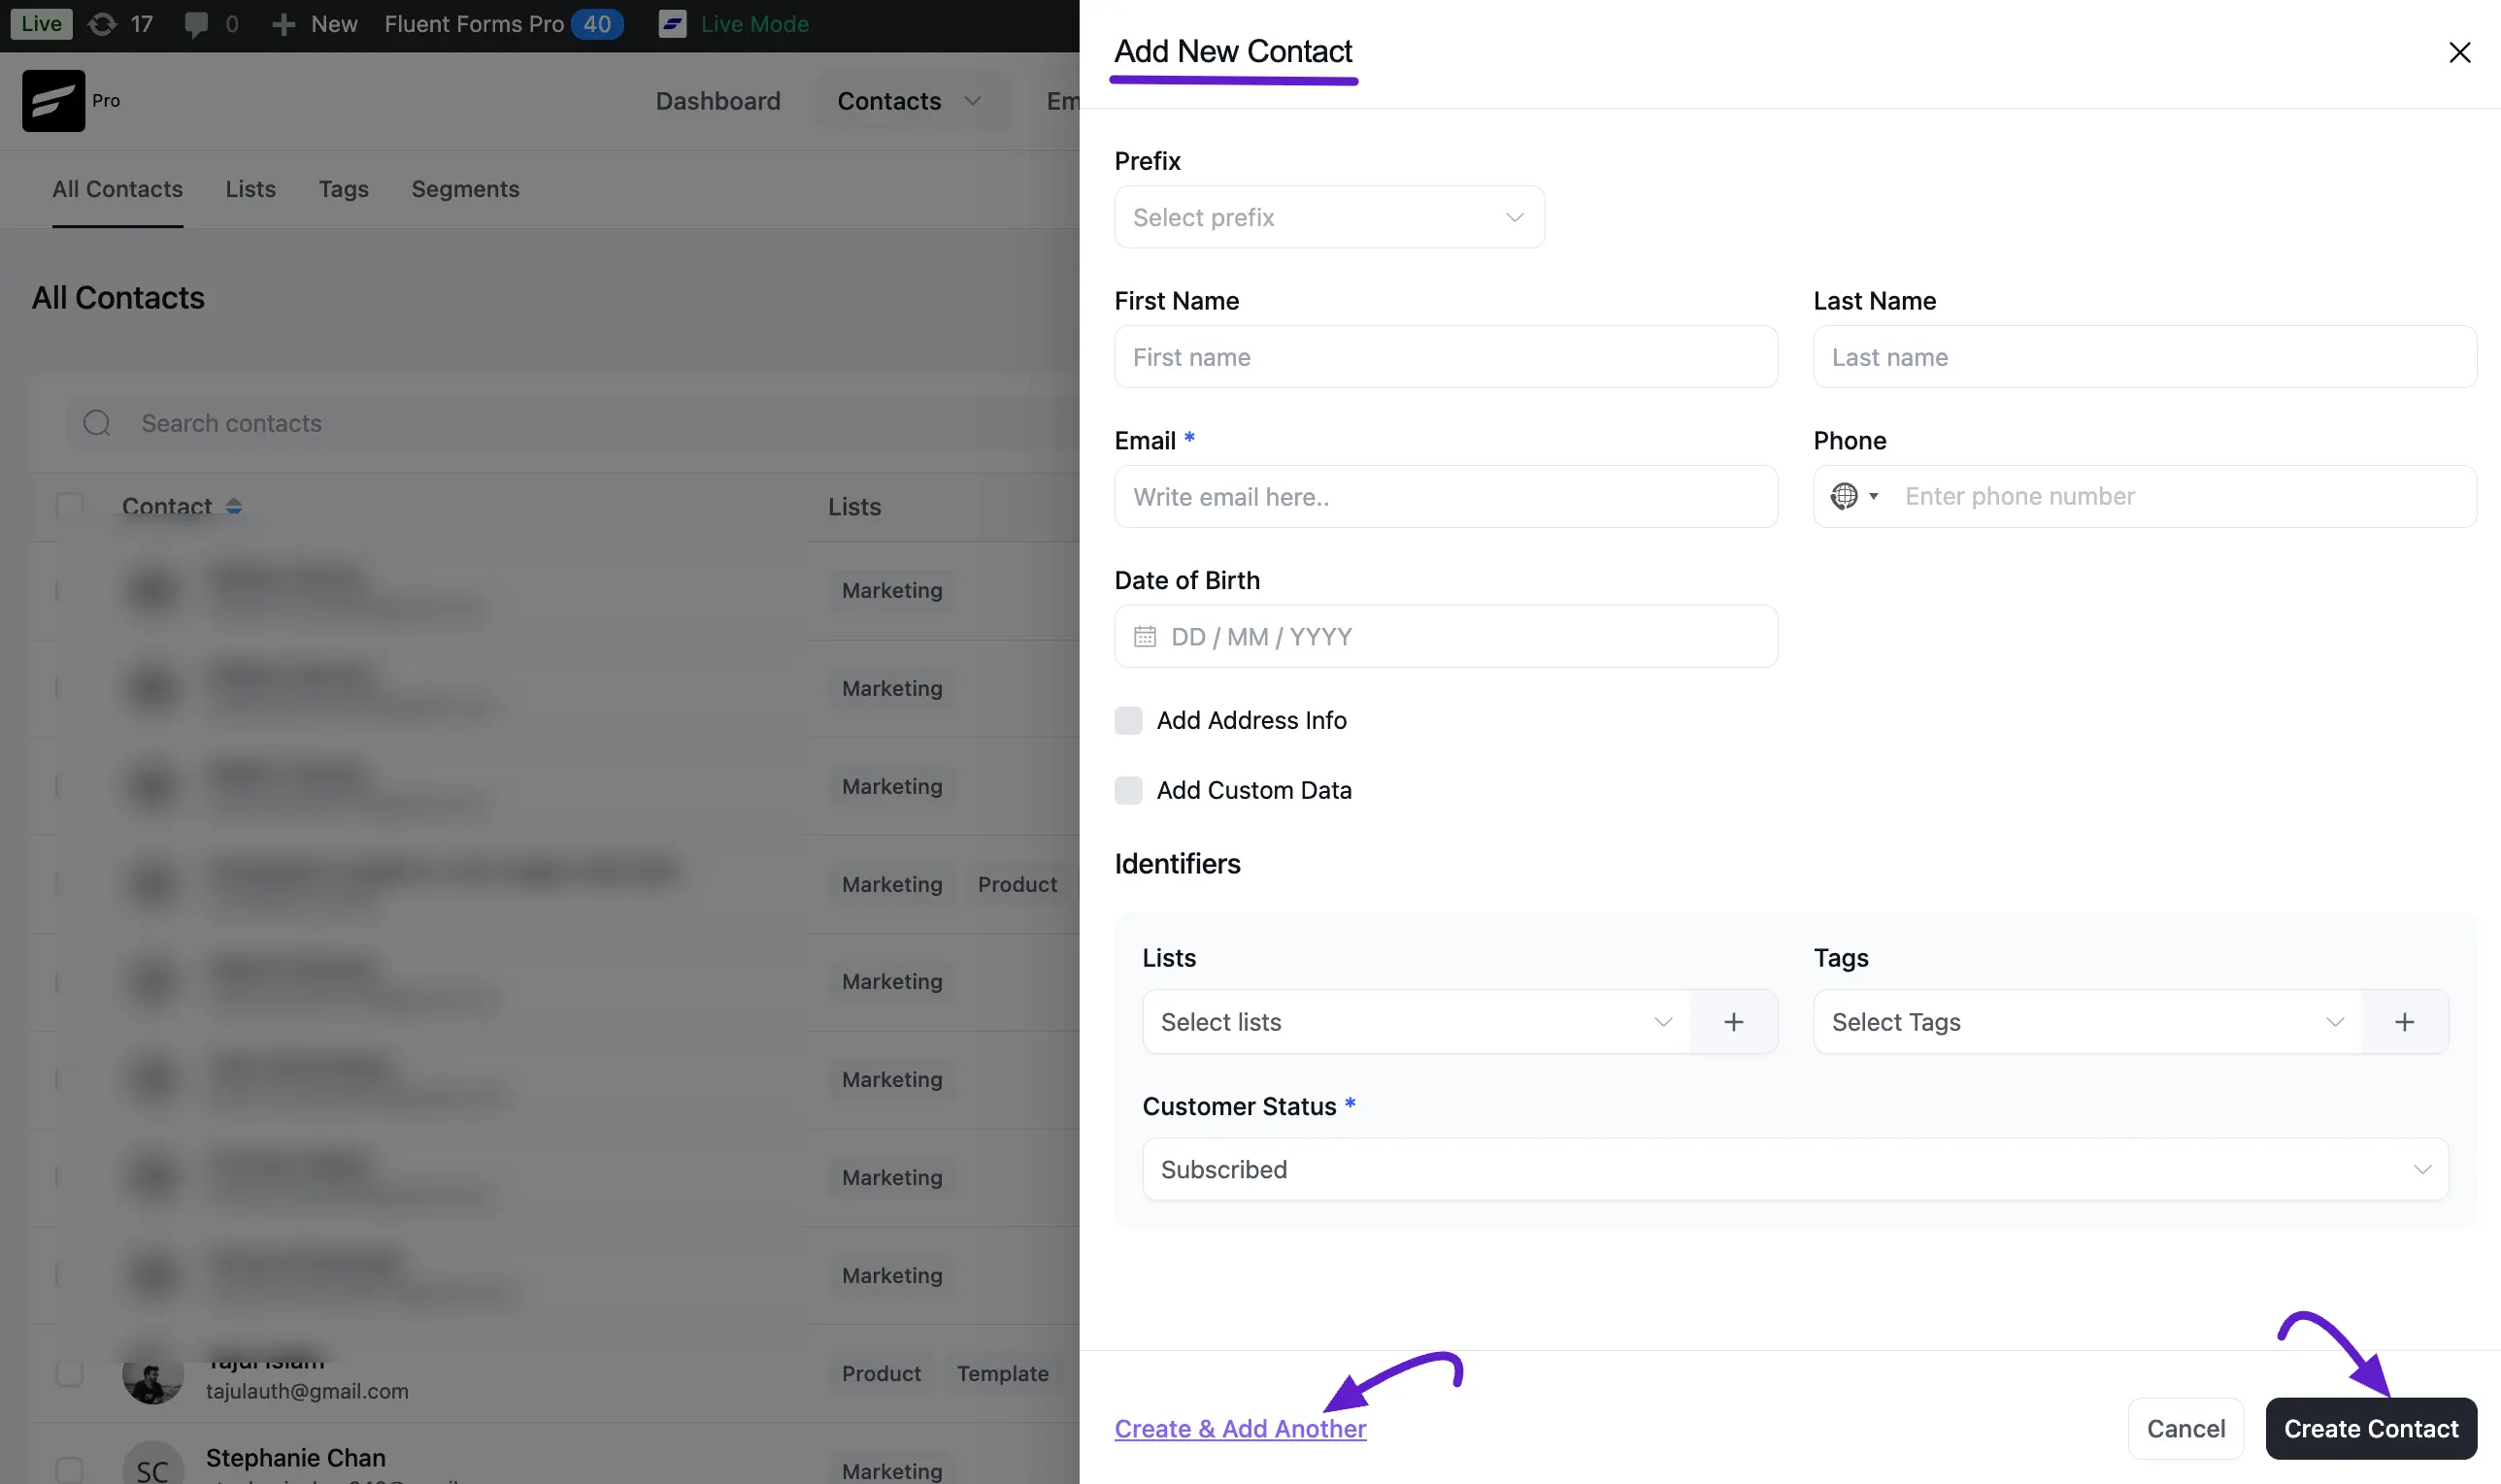
A panel slides open on the right with the following sections:
- Basic Info: Prefix, First Name, Last Name, Email, Phone, Date of Birth, and Company.
- Address Info: Address Line 1, Address Line 2, City, State, Postal Code, and Country.
- Custom Data: Any custom contact fields you have configured in FluentCRM. See Custom Contact Fields.
- Identifiers: Lists, Tags, and Subscription Status for this contact.
Once you have filled in the details, click Create Contact to save, or Create & Add Another to save and immediately open a blank form for the next contact.
Assigning or Creating a Company
The Company field in Basic Info is a live-search selector. Type to find an existing company from your Companies list.
If the company doesn't exist yet, click the + Create New button that appears in the dropdown. A slide-in drawer opens with the full company creation form. Fill in the company details and save — the new company is created and automatically selected for the contact you are adding, without leaving the form.
NOTE
The + Create New button is visible only to users with permission to manage companies in FluentCRM.
Managing Contacts In Single or Bulk
FluentCRM also provides an easy way to apply various actions against single or multiple contacts upon selection. To learn how to manage a single contact or multiple contacts in bulk, follow the steps with the screenshots below –
New in v3: When one or more contacts are selected, a bulk-action floating bar appears at the bottom of the screen with the most-used actions ready to apply – it stays in view as you scroll, so you don't need to return to the top of the page after picking your contacts. You can also paginate up to 600 contacts per page from the pagination dropdown for very large lists.
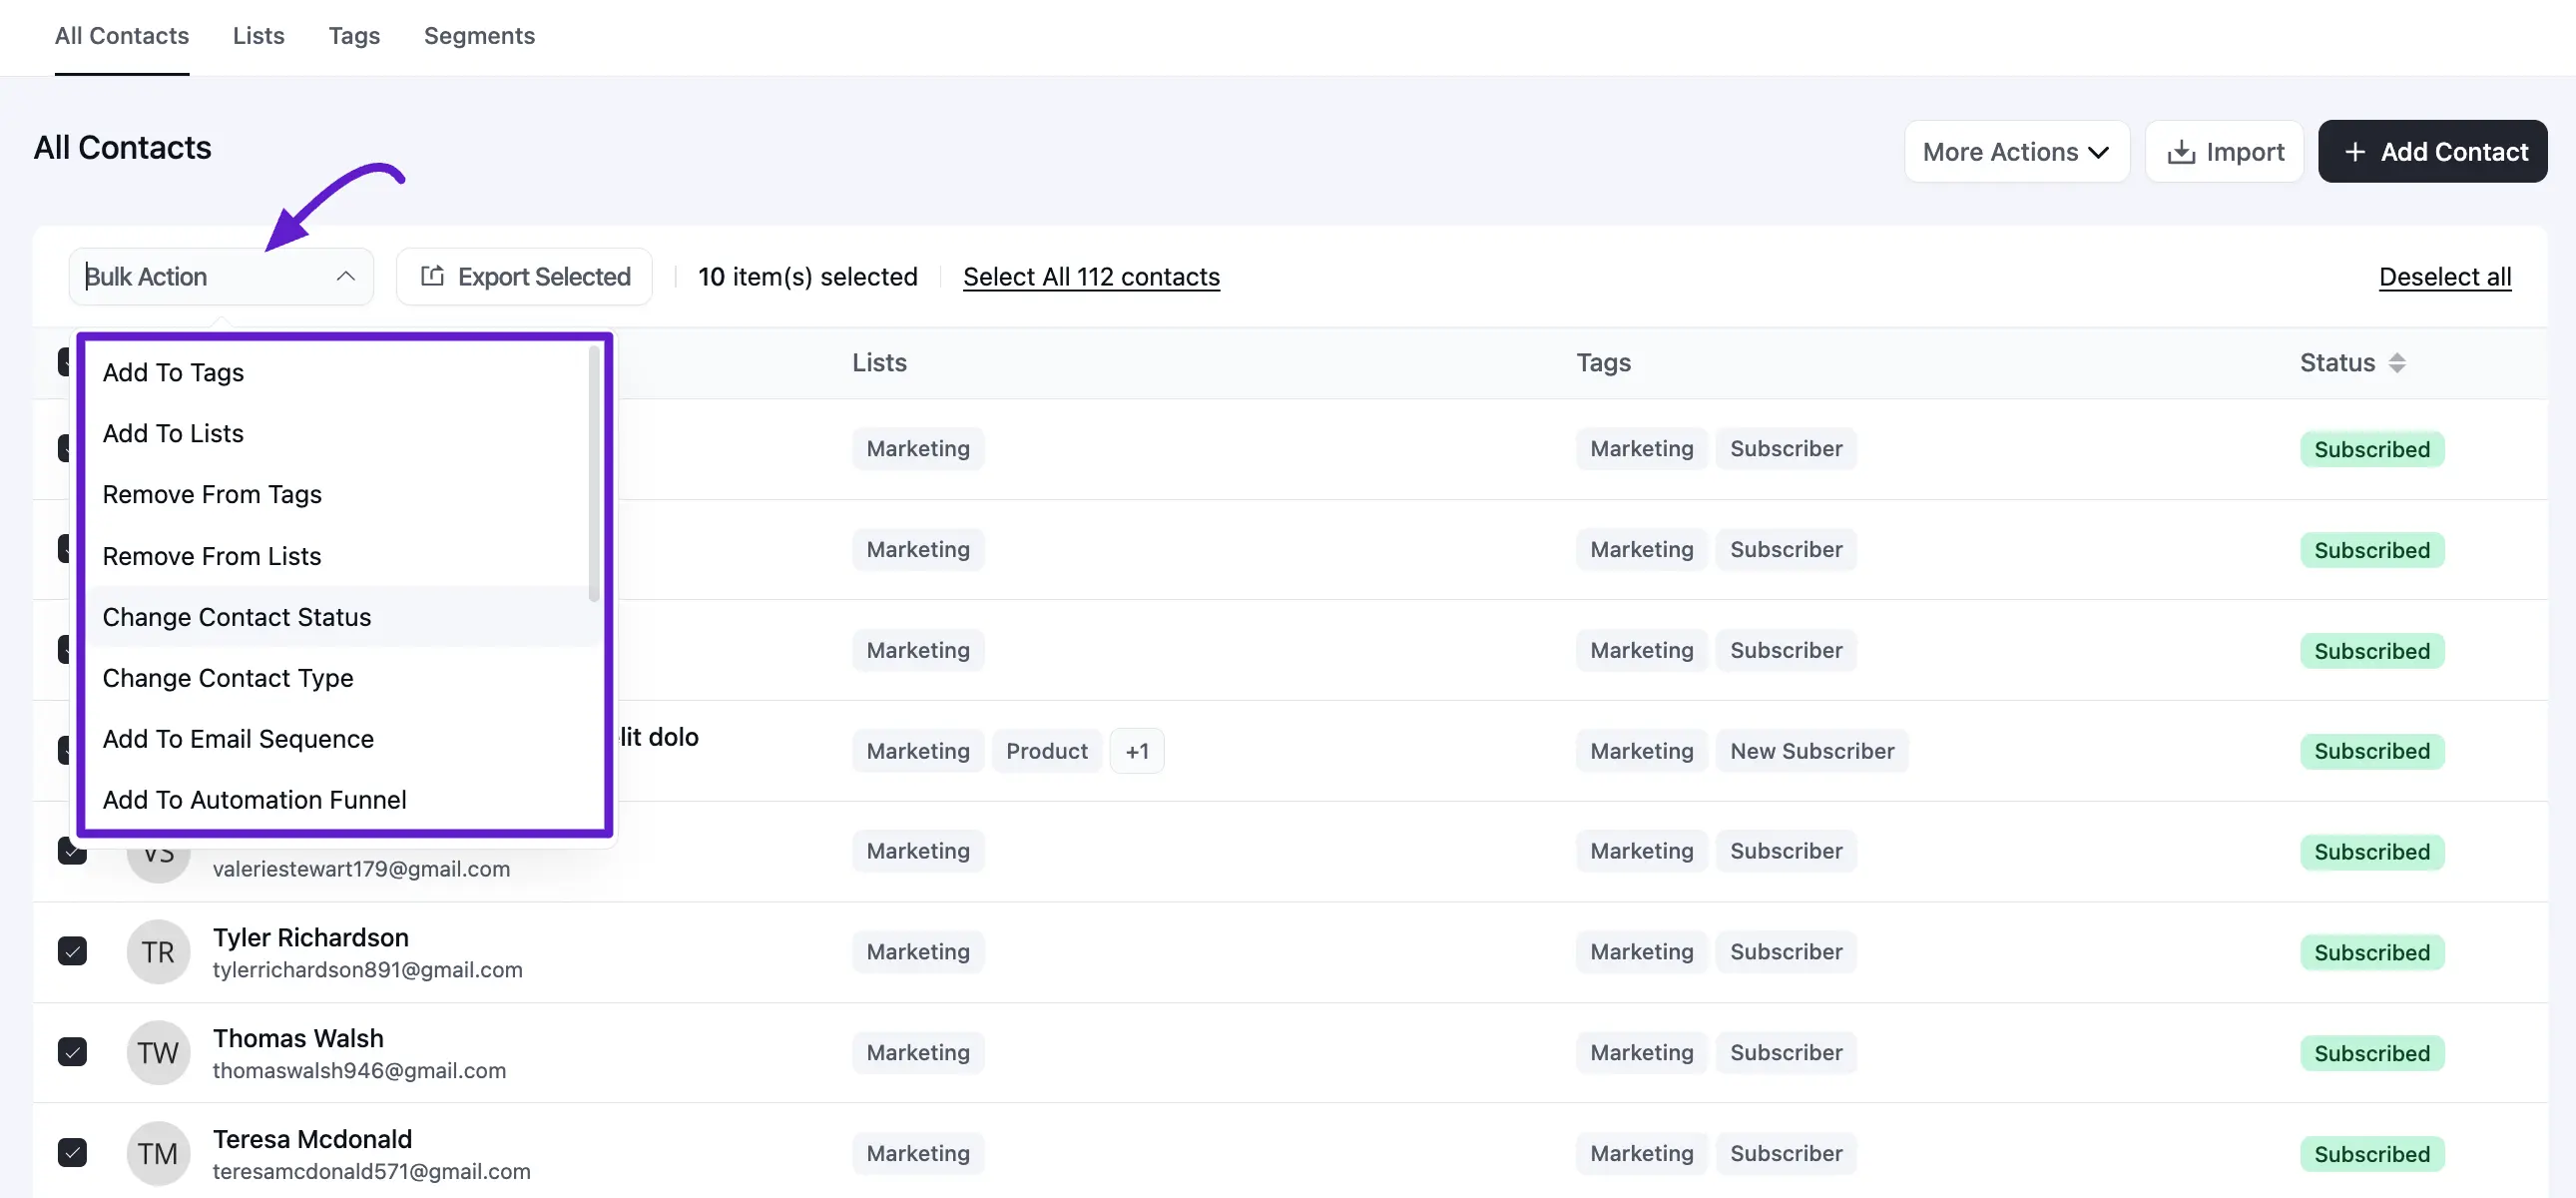
First, select the desired contact/s you want to manage, a Select Action dropdown field will appear click on it and you will get all the Actions for managing your contact/s.
All the available Actions for Managing your Contact/s mentioned below are briefly explained below:
- Add to Tags: Attach a Tag or multiple Tags to the contact/s.
- Add to Lists: Assign a List or multiple Lists to the contact/s.
- Remove From Tags: Remove the contact/s from a Tag or multiple Tags.
- Remove From Lists: Remove the contact/s from a List or multiple Lists.
- Change Contact Status: Change the contact subscription status for contact/s.
- Change Contact Type: Change the type (e.g., lead, customer, etc.) for the contact/s.
- Add to Email Sequence: Add the contact/s to an Email Sequence.
- Add to Automation Funnel: Add the contact/s to an Automation Funnel.
- Add to Company: Add the contact/s to a selected company.
- Remove from Company: Remove the contact/s from any company.
- Send Double Opt-in Confirmation: Once you select contact/s, can send a Double Opt-in Confirmation Email to the pending status contact/s.
- Delete Contact: You can also delete a single contact or multiple contacts based on your selection.
Additionally, you can also Import or Export your FluentCRM contact/s based on your selection.